Monday, September 28, 2015

What's the Deal with Mushroom Season? + Why Amateur Mycology is Important!

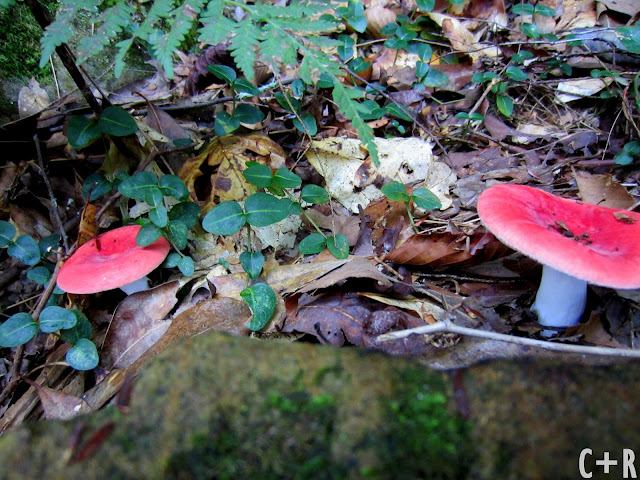
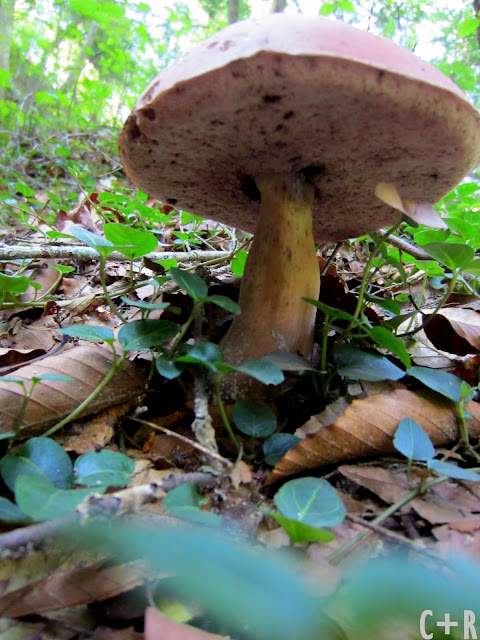
Although I preach a long-standing love and adoration for all most things fungal, this is really the first year that I have dedicated any serious time to learning about how and when mushrooms grow, along with how to collect them for studying, and how to differentiate species from species (to a limited extent...)


While my field guides and other fungal identification books consistently list a range of months during which particular mushroom species grow in which parts of North America, I'm now seeking more specific answers. 

As far as my understanding and observations go, in my area micorrhizal fungi growth seems to thrive in a warm-to-hot, moist setting in sandy soils. That means that for most, if not all, of May through early November, the environment would be pretty ideal for growth (give or take seasonal drought.)

In my case, however, I really started to notice a lot of fruit bodies in mid-to-late-July of this year, and quit seeing them after Labor Day weekend. Notably, last year I found a magnificent trove of giant puffballs growing in my mother-in-laws backyard in mid-October, among a host of edible LBMs (little brown mushrooms). 

Considering my new-found excitement and passion for mushroom hunting/identification and hope for the reappearance of those giant puffballs this year, it's a bit frustrating that the only mushrooms I have seen in the last couple weeks have sprouted out of my rabbit's cage, where her leaking water bottle intersects her pile of magical poo. Other than those, I found two white dunce caps this morning after it warmed up following a nice drizzle of fall rain. But that's IT--that's all I have seen since Labor Day! And it seems like this would be prime hunting season, considering the weather and the conditions under which I've found them previously. In case you've been wondering why there haven't been any "Mushroom of the Day" or mushroom hunting trip posts lately, this is why!

I would love to have the scoop on mushroom hunting season in my part of the world. Unfortunately, the majority of the North American mycology literature I have been privy to contains data that has been collected from New England, the Pacific Northwest, and the Great Lakes area--all very far and quite different climate-wise from where I live. 

For my purposes, though, and for those of the encouraging number of people I've come across in my area who have at least relative interests in mycology, it would be worthwhile to continue to explore when and where we can expect to find fruit bodies here. I have this horrid tendency of giving up on hobbies, crafts, and projects the moment I make an error (like being wrong about when I'll find 'shrooms)...it's this obnoxious thing perfectionists do. But hey, I'm working on it! Anyway, more research on local fungi needs to be conducted and more data needs to be recorded, even if only by amateur mycologists like myself, in order to promote better understanding of this oft-overlooked area's plentiful and diverse fungi life. 

While on the subject, a lot of people don't understand the importance of really and truly understanding all of the growth patterns of the things that come up around us--particularly of mushrooms which are often labeled "crude" and "weird", accused of being from other planets, and as far as edibility is concerned, called dangerous and disgusting. There are so many misconceptions about mushrooms that need to be shattered in order to promote the good word of their medicinal, health, environmental remediation, and aesthetic properties. Mushrooms could save the world! I firmly believe it's important to learn and appreciate as much as we can about them, the same way a lot of people would instinctively try to figure out a mystery fruit or flower growing on a vine in their backyard, for example--just out of pure curiosity, if nothing else. Curiosity is a beautiful thing. And mushrooms are fabulous things to be curious about. 


I know I don't have many readers, but if you're an amateur (or otherwise!) mycologist out there who may have more specific info about mushroom growth periods, let me know what you think!

Happy hunting.
Much love,
Cara

Tuesday, September 22, 2015

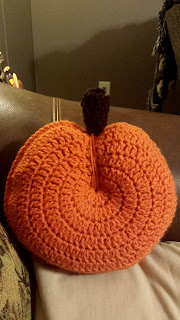
Crochet Pumpkin Pillow Pattern

Crisp brown leaves carpet our yard, brisk breezes rattle through the trees, cotton's in full bloom, and the sweet, sweet smell of pumpkin and cinnamon wafts through our kitchen...and also through Starbucks--it's that time of year again. IT'S FALL, Y'ALL! And something about it gives me the insatiable urge to crochet crochet crochet until my fingers ache. But I don't want to crochet just anything--I want to crochet ALL THE FALL THINGS. And what's more autumn-tastic than a sweet little pumpkin accent pillow perching preciously on your arm chair? Nothing, really.

Below you'll find an easy-to-follow crochet pattern to quench your fall craft thirsts. Please keep in mind that this pattern is for personal use only. You do not have my permission to sell the pattern, or the finished product(s) for profit.


Here's what you'll need: 


  • Worsted weight yarn in orange, green, and brown. I used Red Heart, but feel free to use your favorite brands or whatever you already have on-hand.
  • Snips
  • Yarn needle
  • I9/5.5mm crochet hook
  • (Not pictured) Polyfill toy stuffing (or the guts of an old pillow--whatever you prefer) 
Pumpkin
Using your orange yarn, chain 5 and connect the ends with a slip stitch to form a ring. 
Round 1: ch. 3, 11 dc into center of ring for a total of 12 dc stitches, slip stitch into top chain of ch. 3 to complete the round. 
Round 2: ch. 3, 1 dc into same stitch (counts as 2 dc), 2 dc into each stitch around for a total of 24 dc stitches, slip stitch into top chain of ch. 3 to complete the round. 
Round 3: ch. 3, 1 dc into same stitch (counts as 2 dc), *1 dc into next stitch, 2 dc into next stitch* repeat from * to * for a total of 30 dc stitches, slip stitch into top chain of ch. 3 to complete the round. 
Round 4: ch. 3, 1 dc into same stitch (counts as 2 dc), *1 dc into each of  next 2 stitches, 2 dc into next stitch* repeat from * to * for a total of 36 dc stitches, slip stitch into top chain of ch. 3 to complete the round. 
Round 5: ch. 3, 1 dc into same stitch (counts as 2 dc), *1 dc into each of next 3 stitches, 2 dc into next stitch* repeat from * to * for a total of 42 dc stitches, slip stitch into top chain of ch. 3 to complete the round. 
Round 6: ch. 3, 1 dc into same stitch (counts as 2 dc), *1 dc into each of next 4 stitches, 2 dc into next stitch* repeat from * to * for a total of 48 dc stitches, slip stitch into top chain of ch. 3 to complete the round. 
Round 7: ch. 3, 1 dc into same stitch (counts as 2 dc), *1 dc into each of next 5 stitches, 2 dc into next stitch* repeat from * to * for a total of 54 dc stitches, slip stitch into top chain of ch. 3 to complete the round. 
Round 8: ch. 3, 1 dc into same stitch (counts as 2 dc), *1 dc into each of next 6 stitches, 2 dc into next stitch* repeat from * to * for a total of 60 dc stitches, slip stitch into top chain of ch. 3 to complete the round. 
Fasten off. 
Repeat all of above for second side of pillow. 
Placing wrong sides together, slip stitch together around the edges of the two halves leaving at least a 2 inch gap to stuff the pillow. After you fill the cavity with the stuffing, finish slip stitching the two halves together and fasten off. 
Next, cut at least approximately 2 yards of your orange yarn, thread it through your yarn needle, double it over and knot the ends. Using the needle, draw your yarn through the centers of both halves of the pumpkin, leaving behind a tail long enough to reach the slip-stitched-together edge of the pillow. Once you pull through both halves of the pillow, loop the yarn through its own tail--between the two strands, so that the knot catches it, and then pull tightly to cinch the yarn around that section of the pillow to create the pumpkin shape. Keep threading the yarn around, through the centers of the pillow halves until it's too short to loop through any further, fasten off at the top of the cinch, tucking in your snipped/knotted end. 


Stem
Using your brown yarn, leaving a tail of at least 8 inches, chain 10 plus 3 (counts as 1 dc) and turn your work, dc in each stitch across. Fasten off after 3 rows of 10 dc stitches, leaving a tail of at least 8 inches. You're just making a simple rectangle here. 


Next, you're going to roll that little puppy up like a taco or a cinnamon roll, like so:


Now, designate a bottom to your stem, and wrap the tail on that end around the base of it, tucking in/weaving the excess into the wrapped yarn to fasten it and solidify your tall cinnamon roll-shaped stem. 
Next, thread your needle onto the tail left on top of the stem, and fish it down the edge of the fabric to the bottom, then using the same threaded yarn, sew it onto your pumpkin pillow where you created the cinch, as such: 


Leaf
Using your green yarn, chain 10. 
1 sc into second chain from hook
1 hdc into next chain
1 dc into next chain
1 treble into each of the next 3 chains
1 dc into next chain
1 hdc into next chain
1 sc into next chain, and turn work to stitch back up the other side of the original chain 10, opposite what you just created
2 sc into same chain (total of 3 sc in this last chain) (this would be a good time to start stitching over the tail to hide/secure it so you don't have to weave it in later)
1 hdc into next chain
1 dc into next chain
1 treble into each of the next 3 chains
1 dc into next chain
1 hdc into next chain
1 sc into next chain
slip stitch into tip to create a more defined point, and fasten off, leaving a tail of at least 8 inches to stitch it onto the pumpkin. 


Thread your needle onto the tail and sew it onto the top of your pumpkin pillow, at the base of the stem:


TA DA!
I hope you didn't find this pattern too hard to follow. A lot of it is adaptable to your own preferences, like how you'd go about creating and attaching the stem, or designing the shape of the leaf. It could also easily be converted to an apple or peach pillow simply by using a red or lighter orange in place of the pumpkin orange. 

This is one of only a couple of patterns I have designed in entirety, and really the first I have tried to write out with the intentions of someone other than myself to use. Please don't hesitate to let me know if you need any of the pattern clarified or translated. I'll do my best!

Happy crocheting!
Much love,
Cara

Thursday, September 10, 2015

Funky Mushroom Christmas Ornament Tutorial!

When I got my first few chickens in early August of this year, I created a BackyardChickens.com account so that I could participate in discussions and ask questions on their forums. After exploring the site, I discovered a pretty vast community of DIYers and artisans who share and swap their work with other site members. One such swap is specifically for handmade Christmas ornaments, so I thought I'd give it a try as an excuse to get crafty and get to know some people in the BYC community. Ordinarily I would be completely repulsed by the thought of Christmas in August/September, but this sounded fun. It didn't take long to decide what kind of ornaments I would be making, as you could imagine. I finished them a couple days ago and shipped them to their recipients yesterday afternoon. One package is going all the way to northern Minnesota! I hope my little ornaments are well received by their new owners and that they will bring an air of magic and luck to them this holiday season. 


Constructing the ornaments was pretty straightforward. I pulled from ideas I saw on Pinterest and Martha Stewart Living (total Martha fan girl, right here) and the following is what I came up with! All it took was a trip to the craft store and a couple (fun) hours of my time. I made three because that's what I signed up for on the swap, so depending on the number you intend to make, you made need greater or fewer supplies. 

I strongly recommend you read the tutorial all the way through before purchasing your supplies and sitting down to make your ornaments. You may need to customize the process to suit your needs. 

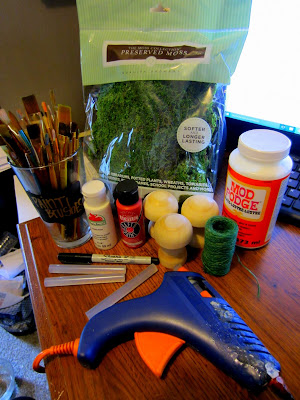
Here's what you need:


  • Mushroom-shaped wooden blocks (I found mine by the woodworking items at Hobby Lobby.)
  • Acrylic craft paint (I used white for the stem and dots, and red for the cap to make it look like a Fly Agaric, but you can use whatever colors you'd like!)
  • Bagged craft moss (Can be found by floral supplies and wreath bases at craft stores.)
  • Hot glue gun (For attaching moss and hanger to the ornament.)
  • Paint brushes (For painting the ornament and applying the optional gloss sealer.)
  • Jute or hemp twine (For the hanger.)
  • Craft scissors
  • Paper towels and/or old newspaper (To cover your work surface and clean up inevitable messes.)
  • OPTIONAL: Black fine point Sharpie (For drawing the gills or pores on under the cap-- it adds a nice detail if you are going for more realistic-looking mushrooms.)
  • OPTIONAL: Modge Podge or other glossy craft sealer (I think adding a gloss sealer to the cap after the paint dries makes it a lot more eye-catching! It'll catch light better from your stringed Christmas lights on your tree, too.)
  • OPTIONAL: Sequins, craft gems, glitter or other fun embellishments for your mushroom cap. 

Now that you have your supplies, here's how you put it all together!: 

Peel any stickers off the mushroom-shaped block(s) and give them a rub down with a paper towel to make sure you don't have any dust left on them from the manufacturing process. This will make sure your paint goes on smoothly and won't chip or peel in the future. 


Next, I gave my mushroom blocks a good base coat of white paint. If you chose a different color for the stem, you could just use that for the base coat instead of white. Make sure you cover the wood completely, from top to bottom. Painting with the grain of the wood makes it look tidier. 


Let them dry completely, and then apply your cap color. Depending on the mushroom species you are modeling your ornaments after, you may or may not choose to paint the underside of the cap. I left mine white. 


After letting the cap dry, paint on your dots or add other fun cap embellishments. You could get super fancy and crafty here, adding sequins or gems instead of painted spots, for example. You could also cover the cap in glitter for something really blingy and funky. Use your imagination and make something that will suit the vibes of your Christmas decor, or the tastes of your gift recipients.


Let your dots and/or embellishments dry completely, and then using your fine point Sharpie, draw your gills on to the underside of the cap You could also draw little dots or circles, for a bolete or polypore mushroom! 


Next, you need to get your glue gun all heated up, and it's time break into that bag of pretty green moss. Tear off strips, shreds, or little patches from the moss--enough that you can hot glue the pieces all the way around the base of the mushroom. (Why yes, this glue gun IS from the early 90s. Thanks for noticing--it's been through a lot. Hahahha.)


Apply a ring of hot glue around the bottom of the stem part of your mushroom, and press your moss into the glue, taking care not to burn your fingers. (Note: If you are doing this craft with your little ones, please handle the gluing part for them.)


After attaching the moss and letting the glue set and dry, I applied a thin coat of the glossy Modge Podge to the cap. I realize I did this a bit out of order. If you want to use a sealer or gloss coating, I would suggest doing it after you paint on your cap color and dots, and before you glue on any embellishments and the moss. Doing it earlier in the process will also prevent you from having to unplug your glue gun to paint on the Modge Podge and let it dry, and then heating it back up afterward to attach your hanger. Sorry if this caused any confusion! That's why I recommend reading the tutorial all the way through before sitting down to make your ornament. 


Let your Modge Podge or sealer dry all the way (I like to give it a good 12-24 hrs to make sure it's completely dry). Now, cut one 5"-6" length per ornament of your jute or hemp twine to use as your hangers. Using your glue gun, apply a bead of glue to the top center of your mushroom cap. Loop your twine piece over, making sure the ends are even, and stick them into the dot of glue. Hold the twine in place for a few moments to let the glue set up a bit. To make the hanger extra secure, apply an extra dab of glue on top of where you placed the ends of the twine.


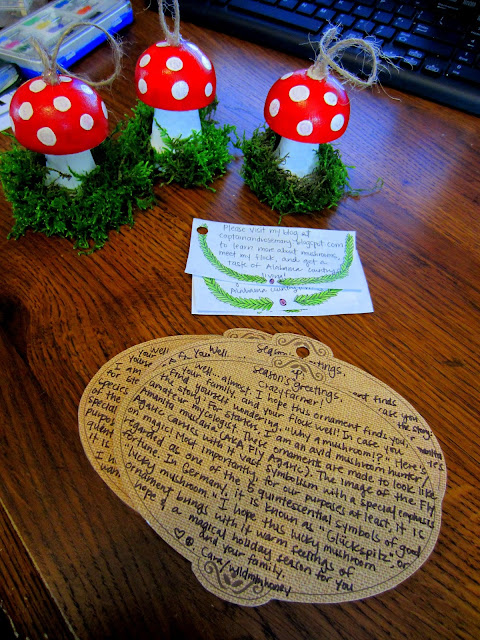
After the glue attaching your hangers gets good and dry, your ornaments are officially FINISHED! Aren't they the coolest!? 

Since I gave mine as gifts, I included a little note with the package, explaining the significance and symbolism of the Amanita muscaria, along with a well wish for this holiday season, and a shameless little promotion for my blog. ;)


I hope you didn't find this mushroom ornament tutorial too repulsive to come across in early September. It is almost peak mushroom hunting season in these parts, after all. And honestly, who doesn't love a little Christmas DIY!?

Happy crafting!
Much love,
Cara